Browsing Category

Recipes

Recipes

Omelet “Muffins”

February 15, 2013

I’m not sure if I’ve ever mentioned this before on this blog, but I am not a morning person. When I’m going to bed at night, I always have these grand plans for my morning “I’m going to get up at 6 and jog! Then I’m going to make a healthy breakfast, and shower and take some time to do my hair and makeup and I’m going to look like a movie star!” Then my alarm goes off and I think “screw that, I’m going to sleep for another hour.” Then an hour and a half later, when I actually drag myself out of bed, I barely have time to throw my hair in a bun after I shower and grab a yogurt as I’m running out the door.

Basically the only time I do any running is when I'm running late.

Basically the only time I do any running is when I’m running late.

I’ve heard lots of people say that “breakfast is the most important meal of the day,” so I’ve really been putting in an effort to make a good breakfast recently. Scrambled eggs, turkey bacon or sausage, some kind of veggie or bean. Problem is, it usually takes me 30 – 45 minutes to cook and consume this healthy breakfast. So I’ve been trying to find ways to still have a good breakfast in the morning while keeping my cook/prep/eating time to about 5 minutes.  When I found this recipe, I was super pumped because not only does it take about 1 minute to prepare in the morning, it’s portable, so I can still eat it as I’m running out the door. It’s the best of both worlds! I usually make these on Sunday night and then I have enough to last throughout the week.

Ingredients:

  • 8 eggs
  • ½ cup cooked meat, cut or crumbled into small pieces (I used turkey sausage)
  • ½ cup red & yellow peppers (or veggies of your choice)
  • ½ cup diced onions
  • 1 15oz can black beans, drained (or beans of your choice)
  • 2 TBSP light ranch dressing (or mayo if you prefer)
  • Salt & pepper (about 1/8 tsp each)
  • Optional: ¼ cup shredded cheese, lightly drained salsa, garlic, etc
  • Tin Foil cupcake cups (optional, but this makes things easier)

Instructions:

  1. Preheat oven to 350°F. Generously grease muffin tins (or foil cups) with butter, pam, or coconut oil.
  2. In a skillet, add sausage (or whatever meat you choose to use), onions, beans, and peppers and  saute until soft. Let cool.

    Although, you could totally eat this all on its own. Yummm

    Although, you could totally eat this all on its own. Yummm

  3. In a bowl, beat the eggs and ranch dressing until thoroughly mixed. Spoon the meat/veggies mixture into the eggs and stir gently to incorporate.

    Eggs just freak me out.

    Eggs just freak me out.

  4. Spoon or scoop the egg/meat mixture into the muffin cups. Make sure you have a good ratio of eggs to meat.
  5. Bake for 18–20 minutes until a knife inserted into the center of an muffin/ omelet comes out almost clean (they’ll continue to cook for a minute or two after removed from the oven).
  6. Remove the omelets from the muffin cups and serve, or cool completely and store for another day.
These are really yummy

These are really yummy

I think next time the only things I would do differently would be getting the tin foil cupcake cups, or just greasing the cupcake pan and making them without the wrapper at all. The eggs stick to the paper a little too much with the paper cups and you end up losing like half of your omelet muffin. I’d also spoon the meat mixture in first and then top it off with the eggs to make sure I got a good ratio with each muffin. Taste-wise though, I’d say they were perfect.

Recipes

Tina Chili

February 8, 2013

My mom makes the best chili. Well, she makes the best pretty much any food you can name, but her chili is especially good. I know lots of people love really spicy chili, but I’m not a person who believes that chili making should actually be a process of developing new and interesting ways to set people’s mouths on fire and ensure they don’t taste things right for at least a week. I like a little bit of kick, but let’s keep it to a reasonable level people. If I have to sign a waiver before I eat your food, IT’S TOO SPICY.

Turning into a fire breathing dragon is not my idea of fun.

Turning into a fire breathing dragon is not my idea of fun.

Ingredients:

  • 1 Green Bell Pepper, chopped
  • 1 Red Bell Pepper, chopped
  • 4 Tablespoons Butter
  • 1 Large Onion, chopped
  • 4 teaspoons Garlic, minced
  • 1 teaspoon Salt
  • 1 teaspoon Dried Oregano
  • 1 Tablespoon Chili Powder
  • 1/2 teaspoon Cumin
  • 1/2 teaspoon Crushed Red Pepper
  • Dash Cayenne Pepper
  • 2-3 Pounds Ground Beef
  • 2 Tablespoons Oil
  • 4 (16 ounce) Cans Black Beans
  • 2 (16 ounce) Cans Mexican-Style Stewed Tomatoes
  • 1 (8 ounce) Can Tomato Sauce
  • 1 (6 ounce) Can Tomato Paste
  • 1 Cup Water

There are two ways of making this chili. The first is the classic Tina method, which takes a lot more work, but is totally worth it. The second is the lazy Sydney method, which involves a crock pot and very little work on your part, but takes a lot more time (since it’s in the slow cooker).
The Tina Method:

Prep:

  1. Chop Peppers & Onions and mince Garlic (set aside)
  2. Open both cans of Mexican-Style Stewed Tomatoes. Put into Food Processor and Puree. (set aside)
  3. Open Can of Tomato Paste. Put into Food Processor. Add with one cup of water and Puree. (set aside)
  4. Brown Ground Beef in 2 Tablespoons Oil. Partially Drain. I add a little of the oil from the browned ground beef to my chili for flavor. (set aside)

Instructions:

  1. Melt 4 Tablespoons Butter in a large dutch oven (Pot).
  2. Add chopped Bell Peppers and Onions and sauté until tender – about 10 minutes.
  3. Add minced Garlic, Salt, Oregano, Chili Powder, Cumin, Crushed Red Pepper, and a Dash of Cayenne Pepper. Stir all together.
  4. Stir in Ground Beef.
  5. Add Black Beans, Stewed Tomatoes, Tomato Sauce and Tomato Paste.
  6. Bring to boil. Reduce heat and simmer for approximately 30-45 minutes. Stirring Occasionally.
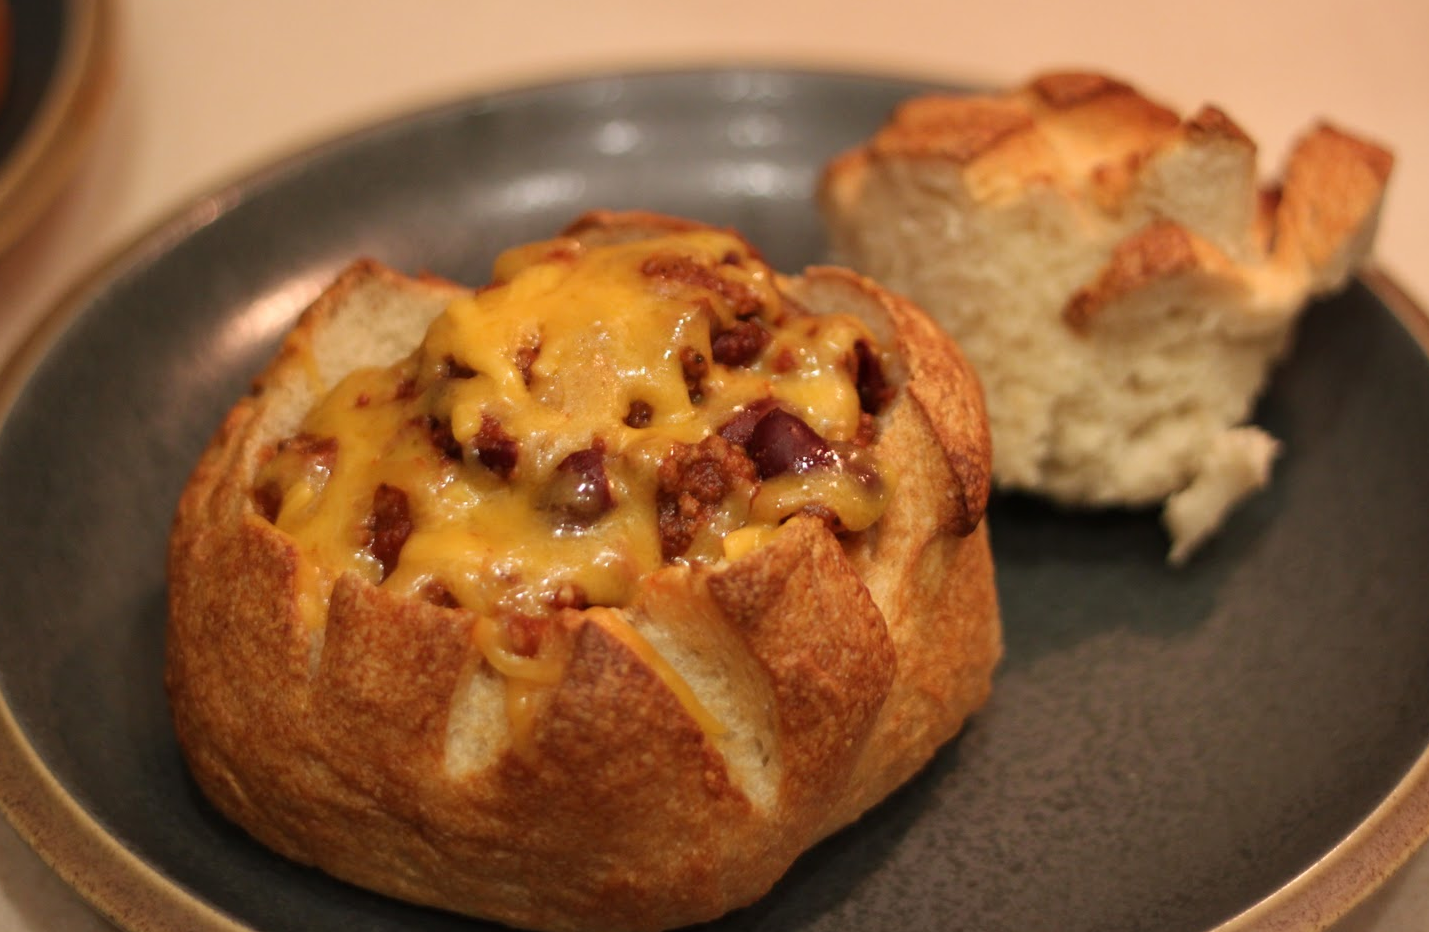
  7. Serve with a good crusty bread ( like a bread bowl if you can find one), some cheddar cheese, or spaghetti noodles.

Notes from Tina:

  • The first time you make it, don’t substitute any thing. You can substitute and adjust the recipe after you’ve tried it this way at least once. Like substituting Cooked, Cubed Chicken for the Ground Beef or Salsa instead of the Stewed Tomatoes. You may even want to cut back on the Crushed Red Pepper or Cayenne
  • You may find that when it’s about done you may need to adjust your seasonings as per your taste like add more cumin and chili powder. You’ll have to play with it til you get it the way that suits you. Sometimes it’s just perfectly fine. Figure out what works for you.
  • If it isn’t thick enough for you mix a little water with flour and pour into the chili, stirring constantly til thick. (Rule: Never pour flour into a hot liquid as it will clump instead of mixing) FYI: Mesa Flour is generally used to thicken chili but white all purpose flour is fine also. And again, you may not need to thicken it. Depends on personal taste.
Bread, chili, cheese... what more could you possibly ask for??

Bread, chili, cheese… what more could you possibly ask for??

The Sydney Method:

Prep:

  1. Chop Peppers & Onions and mince Garlic (or buy the stuff that’s already done for you)
  2. Brown ground beef and partially drain.
  3. Open Can of Tomato Paste. Put into Food Processor. Add with one cup of water and puree

Instructions:


  1. Put all ingredients in crockpot. Stir together.
  2. Put crockpot on low and cook for ~8 hours.
  3. Enjoy with sour cream, good crusty bread, and/or shredded cheddar cheese (or on its own if you’re looking for a low carb dinner option)

Notes:

  • I usually do 2 cans of black beans and 2 cans of either kidney or pinto beans for a little variety. 
  • Once, I didn’t have tomato paste and used a can of refried beans instead. It worked great.
  • That same time, I also didn’t have a plain can of tomato sauce, so I used marinara sauce instead, and it was fine.
Basically I'm obsessed with chili.

Basically I’m obsessed with chili.

Recipes

Slow Cooker Southwestern Chicken Chili

January 11, 2013

Now that I’m working full time, the time that I have to spend cooking has diminished. I feel like I’m only home for ten minutes before it’s time for bed. Luckily for me, I got a Crockpot for Christmas, which is kind of like having a mini chef to do all of my cooking for me. Plus I have meals for multiple days at a time, which is awesome for my laziness.

Well? Do you?

Well? Do you?

Going along with my New Year’s Resolutions, I’ve been trying to cook healthier things for myself that are still delicious. I have a bunch of recipes saved that I’m excited to try, so look forward to those! My first one is a Southwestern 2 Bean Chicken dish that I adapted from a picture I found on Pinterest. I have a smaller crockpot and was trying to avoid corn, so I changed up the recipe a bit.

The Crock Pot is my new favorite kitchen tool

The Crock Pot is my new favorite kitchen tool

Ingredients:

1 pkg chicken breast tenderloins from Costco (or 2 chicken breasts)
1 chicken-flavored bouillon cube (I use Knorr)
1 (15 ounce) can low-sodium kidney beans, drained
1 (15 ounce) can low-sodium black beans, drained
2 (15 ounce) cans fire-roasted diced tomatoes in juice (I use low sodium)
1 (12 ounce) jar of your favorite salsa (I used Newman’s Own Medium)
1/2 avocado, sliced

Instructions:

Line the chicken breasts on the bottom of your crock pot. Pour the beans, tomatoes, and salsa over the chicken and stir to mix. Cook on low for ~7 hours (mine cooked for about 8.5 hours and was perfect), or until the chicken easily shreds when you stir the pot. Serve and top with avocado or your other favorite toppings, like cheese or sour cream.

It kind of looks like a flower. A beautiful, beany, avocado-y flower.

It kind of looks like a flower. A beautiful, beany, avocado-y flower.

The consistency kind of came out at a cross between a soup and chili. It reminds me a lot of the Chicken Chili from Five Loaves Cafe which is one of my favorite soups. Best of all, this recipe took me approximately 2 minutes to prepare, and most of that was opening cans. It cooked while I was at work, and when I got home, my apartment smelled AMAZING.

Recipes

Italian-Style Turkey Meatballs

August 22, 2012

So, I recently started dieting, kind of, and was trying to find some ways to use ground turkey in place of ground beef to save some calories and fat. I Frankensteined some recipes that I found off of the internet together to come up with this Turkey Meatball recipe that I think is pretty delicious…but then, I think everything I cook is delicious, so…

…ok, well MOST everything I cook.

Ingredients:

  • 1 pound Ground Turkey 93/7
  • 1/2 C Red Onion
  • 1/4 C Chopped Red Bell Pepper
  • 2 tsp Minced Garlic
  • 1/2 C Ricotta Cheese, part skim milk
  • 1/2 C Italian-style Breadcrumbs (I used Progresso)
  • 1 Tbsp Dried Parsley
  • 3 Tsp Italian Spices Mix
  • 2 Tsp Black Pepper
  • 2 Tsp Salt
  • 2 Tbsp Extra Virgin Olive Oil

Instructions:

1. In a bowl, mix together everything but the olive oil.

Oh, boy, doesn't that look appetizing!

Oh, boy, doesn’t that look appetizing!

2. Add the olive oil to a frying pan set on medium-high heat and start rolling out your meatballs. I got about 16 balls out of the whole thing, but depending on how big you’re making them, you might get more or less.

They're getting there!

They’re getting there!

3. Cook them until they register 165 degree internal temperature. I like to have a little crisp on the side, so I turned the heat up a bit at the end, but it’s totally up to you.

That's not burned, it's "crisp!"

That’s not burned, it’s “crisp!”

4. Serve the yummy meatballs with some pasta or just with some marinara sauce for a meal. Only 300 calories per serving (serves 5 people, or one person over 5 meals, which is what I ended up doing). I also sprinkled it with some fresh basil and parmesan cheese. Yummm!

See, now it looks really yummy. OH YE OF LITTLE FAITH

See, now it looks really yummy. OH YE OF LITTLE FAITH

Recipes

Italian Macaroni and Cheese

February 21, 2012

So, if you read my blog or know anything about me, you know that I have a weakness for macaroni and cheese. Macaroni and Cheese is my kryptonite… no matter how well I’m doing on a diet, I can’t ever seem to resist some cheesy mac. I guess if I’m being honest, I love anything with copious amounts of melted cheese on it–grilled cheese, fettucini alfredo, lasagna, queso dip, etc. I read somewhere once in a marketing textbook (or maybe I dreamed it…it’s really hard to say), that people are 70% more likely to buy something if it’s illustrated with a picture of melted cheese (I know I’m guilty of this, so we’ll call it science).

Recently my mom posted a video on my wall of some italian guy named Fabio making italian macaroni and cheese, and even though I’d decided that morning I was going to start dieting, I knew that if I didn’t make that recipe soon, I’d be dreaming about Mac n Cheese for the next few weeks. So, of course, I went out that afternoon and bought all of the ingredients I needed for my cheese extravaganza.

I edited the recipe a bit from Fabio’s recommendations, partly because I couldn’t find fontina cheese, and partly because it is impossible for me to exactly follow directions of any kind. So below is my edited recipe from Fabio’s Italian Macaroni and Cheese.

Ingredients:

  • 1 lb. dry elbow macaroni
  • ½ cup shredded Parmesan cheese
  • 2 cups shredded cheddar cheese
  • 8 ounces shredded smoked gouda cheese ( just got a round from Bi-Lo and shredded the entire thing)
  • 1/3 cup crumbled blue cheese (or gorgonzola)
  • 1.5 cups heavy cream
  • 12 cloves garlic, minced
  • 3 Tbsp. extra virgin olive oil
  • 2 cups panko breadcrumbs
  • 1 bunch fresh parsley
  • 1 lemon, zested
  • Salt and cracked black pepper to taste

Instructions:

  1. Put the heavy cream and all the cheeses into a metal mixing bowl.
  2. Add cracked pepper and pinch of salt to cream and cheese.
  3. Put the bowl on top of a pot of boiling water on medium high and stir until the cheese is melted, set it aside.
  4. Cook pasta in the pot of boiling water until al dente.
  5. Drain the pasta and set aside.
  6. Saute the minced garlic in olive oil over medium heat until soft.
  7. Remove garlic and mix with pasta.
  8. Mix in the cheese sauce, and put in the pot and heat for 2-3 minutes, stirring often. At this point, if you didn’t want to bake the macaroni, you could eat it right now. It tasted great and would’ve made a great creamy macaroni and cheese. I kind of wish I’d set some aside to compare the difference in taste.
  9. While the sauce is heating, put the breadcrumbs, parsley and lemon zest in a food processor and pulse until well combined.
  10. Place Mac and cheese in an oven safe container and top with bread crumb mixture and bake at 400F for 10-15 minutes or until golden brown. I made the mistake of leaving the macaroni in too long. The original recipe said 15-20 minutes, and I left it in for 17, and my finished result was not as creamy as I’d wanted it to be. I think it would have been much better had I not left it in as long.
  11. Also, I topped it with some more cheese, which I would advise against doing, since the cheese will burn before everything else is finished cooking. If you do want to top it with some cheese, do it like 2 minutes before you plan to take it out, that will it will be melty and delicious, and not burnt.

aaaand there goes my diet again.

aaaand there goes my diet again.

Recipes

Spaghetti Squash Primavera

December 25, 2011

So because I’ve convinced myself that I’m going to lose weight over the holiday season, rather than gain any (don’t you roll your eyes at me), I’ve been trying to find some healthy-ish versions of side dishes to serve at the Christmas dinner table so that I don’t gorge myself on stuffing and mashed potatoes. One that I found, that’s a bit more Mediterranean than what is typically found at American Christmas dinners, is spaghetti squash primavera. Typically “primavera” is italian, but add some feta cheese and ipso facto, it’s now Mediterranean.

It’s all Greek to me!

Ingredients:

  • 1 spaghetti squash, halved lengthwise and seeded
  • 2 tablespoon minced garlic.
  • 2 tablespoons Italian seasoning
  • 2 bay leaves
  • 2 tablespoons olive oil
  • 1 onion, chopped
  • 1 tsp garlic, minced
  • 2 cups chopped tomatoes
  • 1 red pepper, chopped
  • 3/4 cup crumbled feta cheese
  • Salt and pepper to taste

Instructions:

  1. Preheat oven to 350 degrees F (175 degrees C). Lightly grease a baking sheet or line the bottom of a baking sheet with non-stick aluminum foil (I prefer the latter method).
  2. On one half of the baking sheet, place 1 tablespoon of garlic, 1 tablespoon of Italian seasonings, and 1 bay leaf. Repeat on the other half of the baking sheet.

    Kind of like you’re the street performer with the ball and the cups.

  3. Place one half of the spaghetti squash with the hollow side over one of the garlic mixtures, and repeat with the other half.
  4. Add an even amount of water to the baking sheet, just enough to come up to the sides of the squash. The amount of water differs, depending on the size of your baking sheet. I used about 2 cups.
  5. Bake 35 minutes in the preheated oven. It’s very important that you don’t overcook the squash. You can test if it’s done by flipping it over and scraping the flesh with a fork. It should naturally separate into spaghetti-like strands. Taste it to make sure that it is the same consistency as al dente spaghetti. It might need 5-10 more minutes in the oven if it is still too tough.

    If you think squash is “mushy,” you’re doing it wrong.

  6. Once it is finished cooking, remove from heat and allow it to cool.
  7. While the squash is cooling, heat oil in a skillet over medium heat. Saute onion and red pepper in oil until tender. Add garlic, and saute for 2 to 3 minutes. Stir in the tomatoes, and cook until tomatoes are warm.
  8. Use a large spoon or fork to scoop the stringy pulp from the squash, and add it to the sauté pan with the vegetables. Toss with the sauteed vegetables, feta cheese, and salt and pepper. Serve warm.

    You know you want some.

Optionally: I added ¼ cup Parmesan cheese in addition to the feta, as well as 2 teaspoons of Italian seasonings right before I served it. I really like Parmesan cheese, this is a personal preference. You could also use a can of stewed tomatoes instead of fresh chopped tomatoes to make it more like spaghetti instead of like a primavera.

If I hadn’t already told you this was squash, you’d never have known the difference.

Basically, I think you can take spaghetti squash and add anything you normally would to spaghetti noodles. I think it tastes pretty much the same, only it’s healthier for you since you’re using all vegetables instead of pasta. My next venture will be to try and make a reduced calorie alfredo sauce or cheese sauce to make a “healthified” macaroni and cheese/spaghetti alfredo dish. Stay tuned!

GET IN MY MOUTH.

Recipes

Mexican Chocolate Cookies

December 24, 2011

So, for Santa this year, I decided to branch out from my usual Place-and-Bake-Sugar-Cookies-With-Holiday-Shapes for Santa and make something different. I figured Santa would probably appreciate a little variation.

Not this year, Dough Boy.

Not this year, Dough Boy.

After some searching online, I found a nifty looking recipe for a spicy chocolate cookie, which I used as a starting place to creating my own recipe. Since my mother has a self-diagnosed gluten allergy, I tried to keep the cookies gluten-free, but also still delicious. I think I succeeded, but I guess we’ll have to wait and see how much Santa enjoyed them before I make a final judgement.

Santa’s feeling a little spicy this year

Ingredients:

  • 1 heaping 2/3 cup chocolate, coarsely chopped (I recommend dark chocolate, but if you only have milk chocolate on hand, that will work, too, just cut the sugar down by 1/4).
  • 1/2 cup almond flour
  • 1/4 cup coconut flour
  • 1/2 teaspoon ground cinnamon
  • 1/4 teaspoon baking powder
  • 1/4 teaspoon salt
  • 1/4 teaspoon black pepper
  • 1/4 teaspoon ground red pepper
  • 1/2 cup granulated sugar
  • 3/4 cup dark brown sugar
  • 1/4 cup butter, softened
  • 1 large egg
  • 1 teaspoon vanilla extract
  • non-stick aluminum foil

Instructions:

  1. Preheat oven to 350°.
  2. Place chocolate in a microwave safe bowl; microwave at HIGH 1 minute or until almost melted, stirring until smooth. Cool to room temperature.
  3. Combine almond and coconut flour, cinnamon, baking powder, salt, black pepper and red pepper in a small bowl and whisk together.
  4. Combine sugar and butter in a large bowl; beat with a mixer at medium speed until well blended (about 3 minutes).
  5. Add egg to the sugar mixture and beat well.
  6. Add cooled chocolate and vanilla; beat just until blended.
  7. Add flour mixture; beat just until blended.
  8. Drop dough by level tablespoons 2 inches apart on baking sheets lined with non-stick foil (if you don’t like non-stick foil, you can just spray the bottom of the pan with a non-stick spray).
  9. Bake at 350° for 10 minutes or until almost set. Remove from oven. Cool on pans 2 minutes and then transfer to a wire rack to finish cooking.
  10. Sprinkle the cookies with cinnamon sugar. I dusted them with a bit of red pepper, just to accentuate the spiciness.
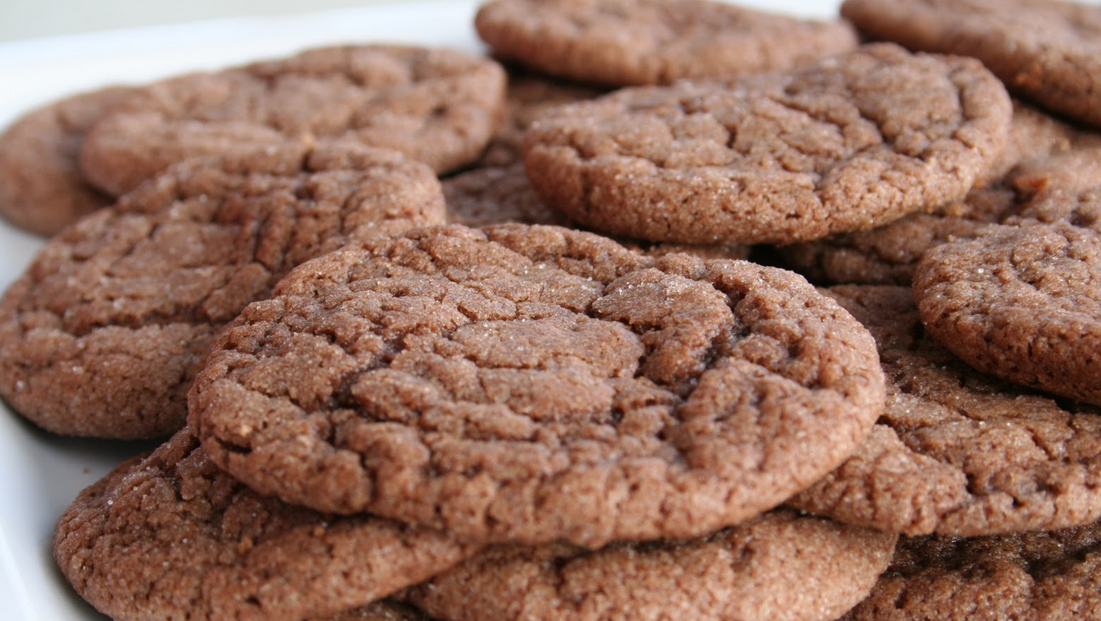
Sugar and Spice and Everything Nice (And by "everything nice" I obviously mean "CHOCOLATE")

Sugar and Spice and Everything Nice (And by “everything nice” I obviously mean “CHOCOLATE”)

Hoping everyone has a safe and satisfactory Christmas tomorrow! And to my non-Christmas-celebrating-friends, enjoy your regular, non-special Sunday!

Recipes

The World’s Best Lasagna

December 13, 2011

So for my official “Night Before My Last Day Dinner Party” I decided to make lasagna for the coworkers I invited over to share in the feast. I had all of these people to impress so I knew I had to do something more than just thaw out a Stouffer’s lasagna (although Stouffer’s is delicious). So I found this recipe online HERE and tweaked it a bit to fit with what I had and how much time I had to do it in. Here is my tweaked recipe:

Ingredients:

  • 1 pound sweet Italian sausage (I used Johnsonville)
  • 1 pound lean ground beef
  • 1/2 cup minced onion
  • 2 cloves garlic, crushed
  • 1 (28 ounce) can diced tomatoes
  • 2 (6 ounce) cans tomato paste
  • 2 (6.5 ounce) cans canned tomato sauce
  • 2 tomatoes, sliced
  • 1/2 cup water
  • 2 tablespoons white sugar
  • 1 1/2 teaspoons dried basil leaves
  • 1/2 teaspoon fennel seeds
  • 1 teaspoon Italian seasoning
  • 1 tablespoon salt
  • 1 tablespoon ground black pepper
  • 6 tablespoons dried parsley
  • No-boil lasagna noodles (I used about 24)
  • 32 ounces ricotta cheese
  • 2 eggs
  • 1/2 teaspoon salt
  • 3/4 pound mozzarella cheese, shredded
  • 12 slices provolone cheese
  • 2 cups grated Parmesan cheese

Instructions:

  1. In a large saute pan (one with high sides, you’re going to be adding a bunch of liquid to it), cook sausage, ground beef, onion, and garlic over medium heat until well browned. Stir in crushed tomatoes, tomato paste, tomato sauce, and water. Season with sugar, basil, fennel seeds, Italian seasoning, 1 tablespoon salt, pepper, and 4 tablespoons parsley. Simmer, covered, for about 2 hours, stirring occasionally.

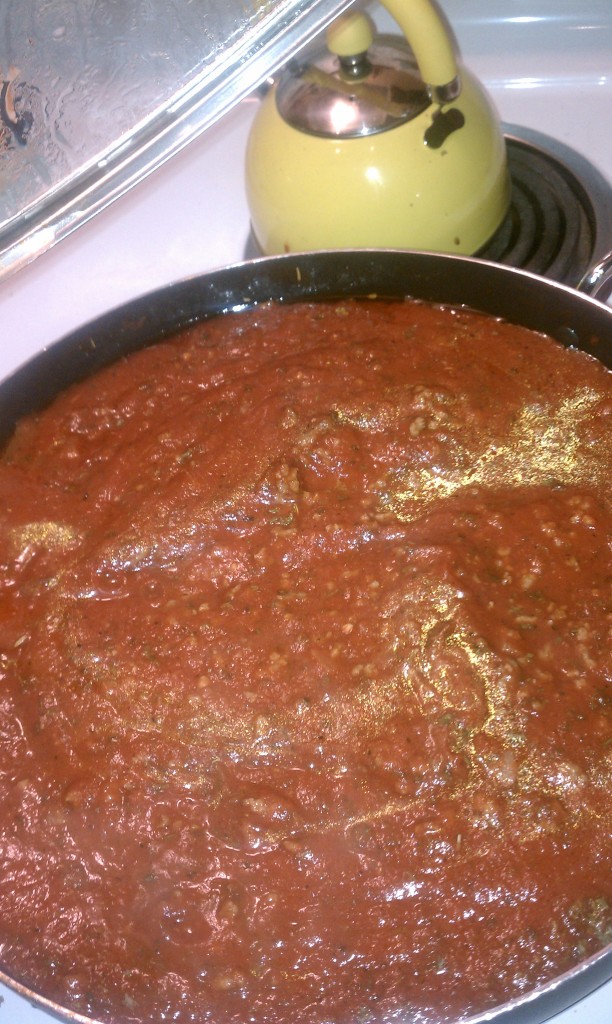
    Meat sauce done right.

  2. In a mixing bowl, combine ricotta cheese with eggs, remaining parsley, and 1/2 teaspoon salt.
  3. Preheat oven to 375 degrees F (190 degrees C).
  4. To assemble, spread 1 ladle full of meat sauce in the bottom of a 9×13 inch baking dish. Arrange noodles lengthwise over meat sauce. Spread with ricotta cheese mixture, and layer with sliced tomatoes. Top with sauce, and sprinkle with mozzarella and parmesan. I eyeballed this, so just use what feels right. I topped it with a bit more meat sauce and then stacked the noodles on top. Repeat layers.

    Noodle meat. (that’s what she said)

  5.  Top with remaining mozzarella and Parmesan cheese. Add 6 slices of provolone and cover with foil. I used non-stick foil with the non-stick side down toward the cheese to keep the cheese from sticking. You could do the same basic thing by spraying aluminum foil with some Pam or other non-stick spray.

    I’ll have a side of cheese with my cheese, please. Also, noodle meat.

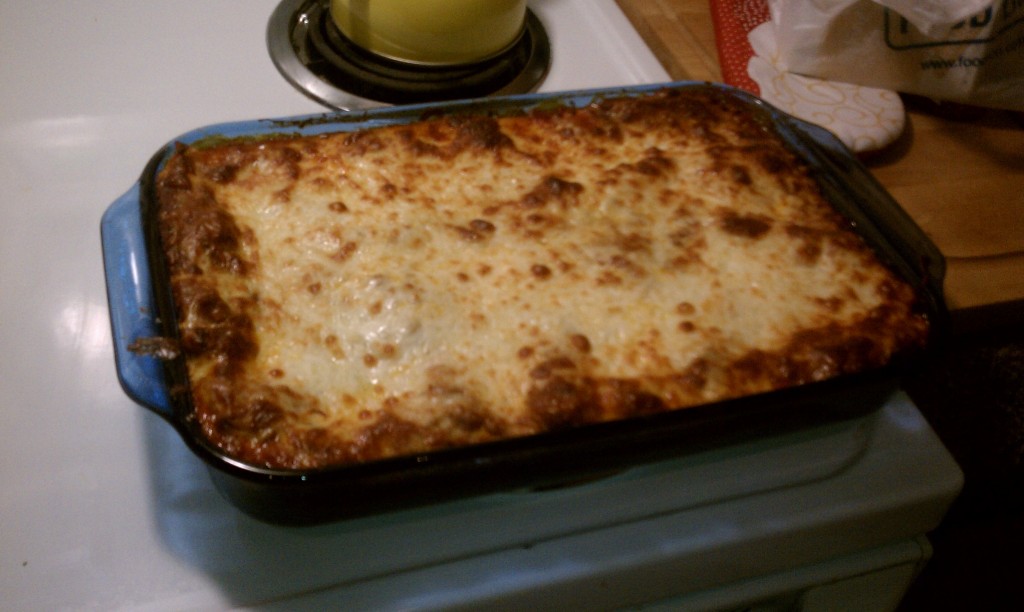
  6. Bake in preheated oven for 25 minutes. Remove foil, and bake an additional 25 minutes. Cool for 15 minutes before serving. I noticed that the cheese was browning a bit too much around the 19 minute mark, so I took it out a bit early.

    Right after I took the foil off.

    19 minutes later. aka perfection.

Needless to say, the lasagna was pretty ballin’. Everyone ate pretty much all of it. I made two casseroles full and only one little slice was left over. I laid out hors d’oeurves to accompany the lasagna, including buttery crescent rolls, meat balls and tomato sauce, and mini caprese salad bites (grape tomatoes, fresh mozzarella cheese, and fresh basil on a toothpick).

I seriously could eat ten thousand of these things. So. Good.

Les brought salad and we all drank wine to go with it. We laughed and talked for like 3 hours. Probably the most fun I’ve had in a really long time. Plus the lasagna was delicious. Then I made chocolate chip biscotti for dessert. It was pretty decadent.

Biscotti is italian for “Cookies from Heaven”

I’m pretty freaking awesome.

Recipes

Pumpkin Palooza!

October 16, 2011

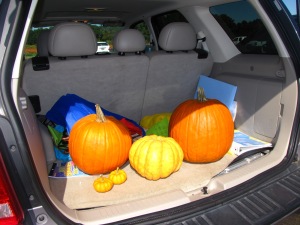
So basically, Sunday was our Pumpkin Palooza day. It was amazing and extravagant and started off with breakfast at the Lost Dog Cafe on Folly (which I review in another of my posts) with Sean’s mom and her boyfriend. It was great fun. Sean and I then went on our 2nd Annual Pumpkin Pickin’ Extravaganza at Legare Farms while Christine was doing homework. We picked out 3 spectacular pumpkins and the closest thing to Rumpkin Pumpkin we could find (it really wasn’t even that close).


RIP RUMPKIN. WE STILL MISS YOU! (He’s the cute one in the middle)

I digress. After we retrieved our pumpkins, we let Christine draw designs on them while Sean and I made delicious Bourbon and Pumpkin Milkshakes, all while watching Stephen King’s Rose Red.

Did I mention it’s 4.5 hours long?

After we were good and liquored up via milkshakes, Sean and I picked up the knives and started carving. We’re all about safety here at QotFA.


Ron Swanson. Because we love Parks and Recreation… and Meat.


These are both Sean and Christine’s pumpkins. I forgot to take pictures of Captain Hook before I left him to liquify on my porch.


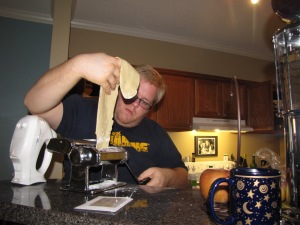
After pumpkin carving was complete, Sean and I started making dinner using the pasta maker he’d gotten me as a birthday gift. I have to say, I think Sean was a bit more excited about it than I was.


That, my friends, is the look of a man hell-bent on making the perfect ravioli.

Anywho, here are the recipes! (Some of the content below comes from All the Hungry People, a collaborative blog on which I am a contributor. GO LOOK AT IT)

Bourbon Pumpkin Pie Milkshakes:

– 2 cups vanilla ice cream

– 1/2 cup milk

– 1/4 cup cream or half-and-half

– 1 tbsp vanilla extract

– 2/3 cup pureed pumpkin

– 1/2 tbsp pumpkin spice [or you can substitute nutmeg & cinnamon like we did]

– 2 to 3 oz (or more, if you’re Sean) of bourbon

– sprinkles for decorating the glass rims [we used turbinado sugar…whatever floats your boat]

Mix up all those lovely ingredients (minus the sprinkles) in a blender and garnish with a beautiful sugar rim! Enjoy!

 Fezzik is a fan of Pumpkin Palooza…. also bourbon.

Pumpkin Ravioli Recipe:

INGREDIENTS:

For The Filling:

  • 1 Two To Three Pound Pumpkin
  • 1 Tbsp Butter
  • 1 Onion
  • 2 Garlic Cloves
  • 2 tsp Ground Sage, or 6-7 leaves fresh sage, chopped
  • 2 Tbsp Honey
  • 4 oz Goat Chevre
  • Salt & Pepper, to taste

For The Pasta:

  • 2¼ cups Flour
  • ⅓ cup Water
  • 2 Eggs
  • Tablespoon Olive Oil
  • Pinch of Salt

DIRECTIONS:

Filling:

1. Preheat your oven to 350 degrees Farenheit. Quarter pumpkin and remove all seeds (set these aside and you can toast them!)Place pumpkin face down on an ungreased cookie sheet and bake for 30-60 minutes, or until a dull knife pierces the flesh easily (the skin may still be tough). When pumpkin is cooked, be sure to let it cool some so you don’t burn yourself!

2. Meanwhile, pour yourself a cup of tea or glass of wine, and get started on prep work. Dice the onion finely, mince the garlic.

3. Cook onions and butter in a medium saucepan over medium heat. When Onions just start too look clearish, add sage, garlic and honey. Remove from heat

4. Using a large spoon, remove the flesh of the pumpkin from the skin. Mash pumpkin with a fork (or toss it in a food processor)and stir into the onion mixture.

5. While mixture is still slightly warm, stir in Goat Chevre and mix until everything looks creamy and delicious. Add Salt and pepper to taste. Cover and set aside.

Pasta:

6. Combine flour, water, eggs, olive oil and salt in a medium bowl and stir with a wooden spoon until it becomes too solid to stir.

7. Remove dough from bowl and knead on a clean, floured surface for a few minutes, until the dough has a smooth texture. You can use a pasta machine, or simply roll your dough with a rolling pin either way you want your dough to be thin enough that you can see the shape of your hand through it when you hold it.

Putting it all together:

8. Working on a floured surface, Start with two pieces of pasta, one slightly longer than the other. Using a spoon, place small dollops of filling in rows on the smaller piece of pasta – leave about 3/4″ between drops of filling.

9. Starting at one side, gently lay the larger piece of pasta over the other, pushing it down onto the bottom piece of pasta in between each of the lumps of filling (if the pasta is too dry and won’t stick, use a pastry brush and water to moisten it slightly). There is a bit of a learning curve here, but don’t worry because this ravioli is always well received, even if it looks ridiculous!

10. Cut the ravioli apart from each other with a sharp knife, to be extra sure they’ll stay together, and for a decorative touch, use a fork (or one of those fancy ravioli rollers) to crimp the edges

11. Put the ravioli in boiling water and remove with a slotted spoon as they begin to float.

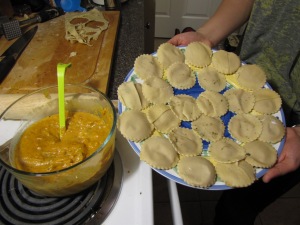
Christine is such a talented ravioli holder..

For the sauce, Sean and I went a little crazy. We browned some butter and sage and added some Alfredo sauce and these sundried tomato and garlic chicken sausages. It was pretty decadent.

 Not-so-Rumpkin pumpkin in the background… Also, Sean’s hand.

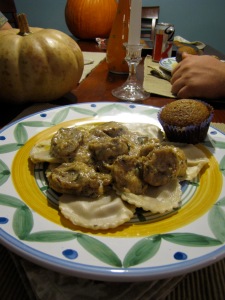
The final product, AKA “I Never Want To See Another Pumpkin Ever Again”

Recipes

Chicken Stuffed with Ricotta and Spinach

October 14, 2011

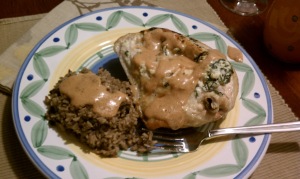
So, Sean and Christine came to visit this weekend, and we made Chicken stuffed with Spinach and Ricotta Cheese in a Saffron Cream Sauce. Basically, it was decadent and delicious. Recipe as follows:

Ingredients:

  • 1 Pinch Salt and Pepper
  • 1 Pinch Saffron
  • 2 Tbsp Clarified Butter
  • 1 LB Spinach, stemmed
  • 4 Oz Ricotta Cheese
  • 2 Egg Whites, lightly beaten
  • 4 Chicken Breasts, 9 oz. each
  • 2 Cups White Wine
  • 1 Cup (8 oz) Chicken Veloute
  • 2 Cups (16 oz) Heavy Cream, hot

Instructions:

  • Blanch, refresh and drain the spinach. Squeeze it tightly to remove as much moisture as possible, then chop it finely.
  • To make the stuffing, combine the ricotta, egg whites and spinach in a mixing bowl; season to taste.
  • Place the chicken breasts on a cutting board, skin side down. Using a boning knife, carefully make a pocket that runs the length of each breast.
  • Put the stuffing in a pastry bag and pipe the stuffing into each pocket. Do NOT overfill the chicken breasts because the stuffing expands as it cooks.
  • Saute the chicken in the clarified butter until well browned. Transfer the chicken to a sheet pan and finish in a 350 degree oven, approximately 10 to 12 minutes.
  • Deglaze the saute pan with the white wine.
  • Add the saffron, bring to a boil and reduce by half.
  • Add the veloute and the cream. Adjust the seasonings and consistency; strain.

I served it with a side of black beans and brown rice cooked in chicken stock. Delish. Even Cullen ate it and enjoyed it and this is a dish that is way out of his comfort zone.

I actually just tried to eat this picture just now…It’s not the same.